
DIY Press-On Nails That Look Salon-Perfect – Nail Trends 2025
Introduction
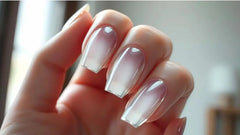
Press-on nails are making a big splash in 2025, offering an easy, cost-effective way to get salon-quality manicures at home. Whether you’re a nail art novice or a seasoned pro, press-ons provide a versatile option for anyone wanting a flawless manicure without the salon visit. Here’s how to apply, customize, and maintain DIY press-on nails for a salon-perfect look.
Why DIY Press-On Nails Are Trending
The popularity of press-on nails has surged due to their:
• Convenience: Quick application for busy lifestyles.
• Customization: Easy to personalize with different shapes, colors, and designs.
• Affordability: Achieve a salon-like finish at a fraction of the cost.

Essential Tools for DIY Press-On Nails
• Press-On Nail Kits: Start with a quality set like the 30pcs Full Cover Press-On Nail Tips.
• Nail Glue and Adhesive Tabs: For strong adhesion, use 6 in 1 Nail Glue Gel.
• UV/LED Lamp: Cure glue for a secure hold with the 36W Pink UV Nail Lamp.
• Nail File and Buffer: Smooth edges and prep the nail surface with Washable Nail Files.
• Top Coat: Seal with a Super Top Coat.
Step-by-Step Guide to Applying Press-On Nails
1. Prep Your Natural Nails
Clean and file your nails to the desired shape. Use a cuticle pusher like the Double Head Cuticle Pusher to gently push back cuticles.
2. Buff and Remove Shine
Buff your nails to remove natural oils and ensure proper adhesion. The Washable Nail Files work great for this step.
3. Apply Nail Glue or Adhesive Tabs
Use 6 in 1 Nail Glue Gel for long-lasting wear or Clear Double-side Adhesive Tabs for a temporary option.
4. Press and Hold
Align the Press-On with your natural nail, press down firmly and hold for 10-15 seconds. Cure with the 36W Pink UV Nail Lamp for added strength.
*PRO TIP - Pay special attention not to apply to much glue, you don't want glue spilling over the sides onto the cuticle.
5. Seal with a Top Coat
Finish with a layer of Super Top Coat and cure in 36W Pink UV Nail Lamp for 30 seconds for shine and durability.

Customization Tips for Press-On Nails
• Add Nail Art: Use this Nail Art Gels and Brushes Set to paint custom designs and patterns.
• Embellishments: Attach Pearls or Rhinestones with 8-in-1 Nail Glue Gel.
• Matte Finish: Apply the Matte Top Coat for a modern twist.


FAQ'S
Q1: How long do press-on nails last?
A1: With proper application and care, press-ons can last up to two weeks.
Q2: Can I reuse press-on nails?
A2: Yes, if removed carefully and cleaned, they can be reused.
Conclusion: DIY press-on nails offer salon-quality look at home
Press-on nails offer the perfect combination of versatility and ease, making them a top trend for 2025. Whether you want a quick color change or a full set with intricate art, press-ons provide the flexibility to switch up your style effortlessly. With the right application and maintenance, your DIY press-ons can look just as good as any salon manicure.
Have you tried DIY press-on nails at home? Share your favorite looks using #NailDaVinci and follow us on Instagram, Pinterest, and TikTok for more DIY nail tips and inspiration!
The Latest Nail News

How to Achieve the Stunning Glass Nail Art Trend in Just a Few Steps
Read Article >
New Opal Nails: The Iridescent Trend That’s Giving Major Mermaid Vibes
Read Article >


Add a comment